From Photo to Painting: An Easy Coneflower Watercolor Tutorial for Beginners
This week’s easy coneflower watercolor tutorial started with something very simple: a picture I snapped on my phone.
Last Saturday, I spent the day at a women's conference where I had a table displaying some of my watercolor paintings and Creative Heart Journals. At some point during the day, I noticed a group of coneflowers growing outside.
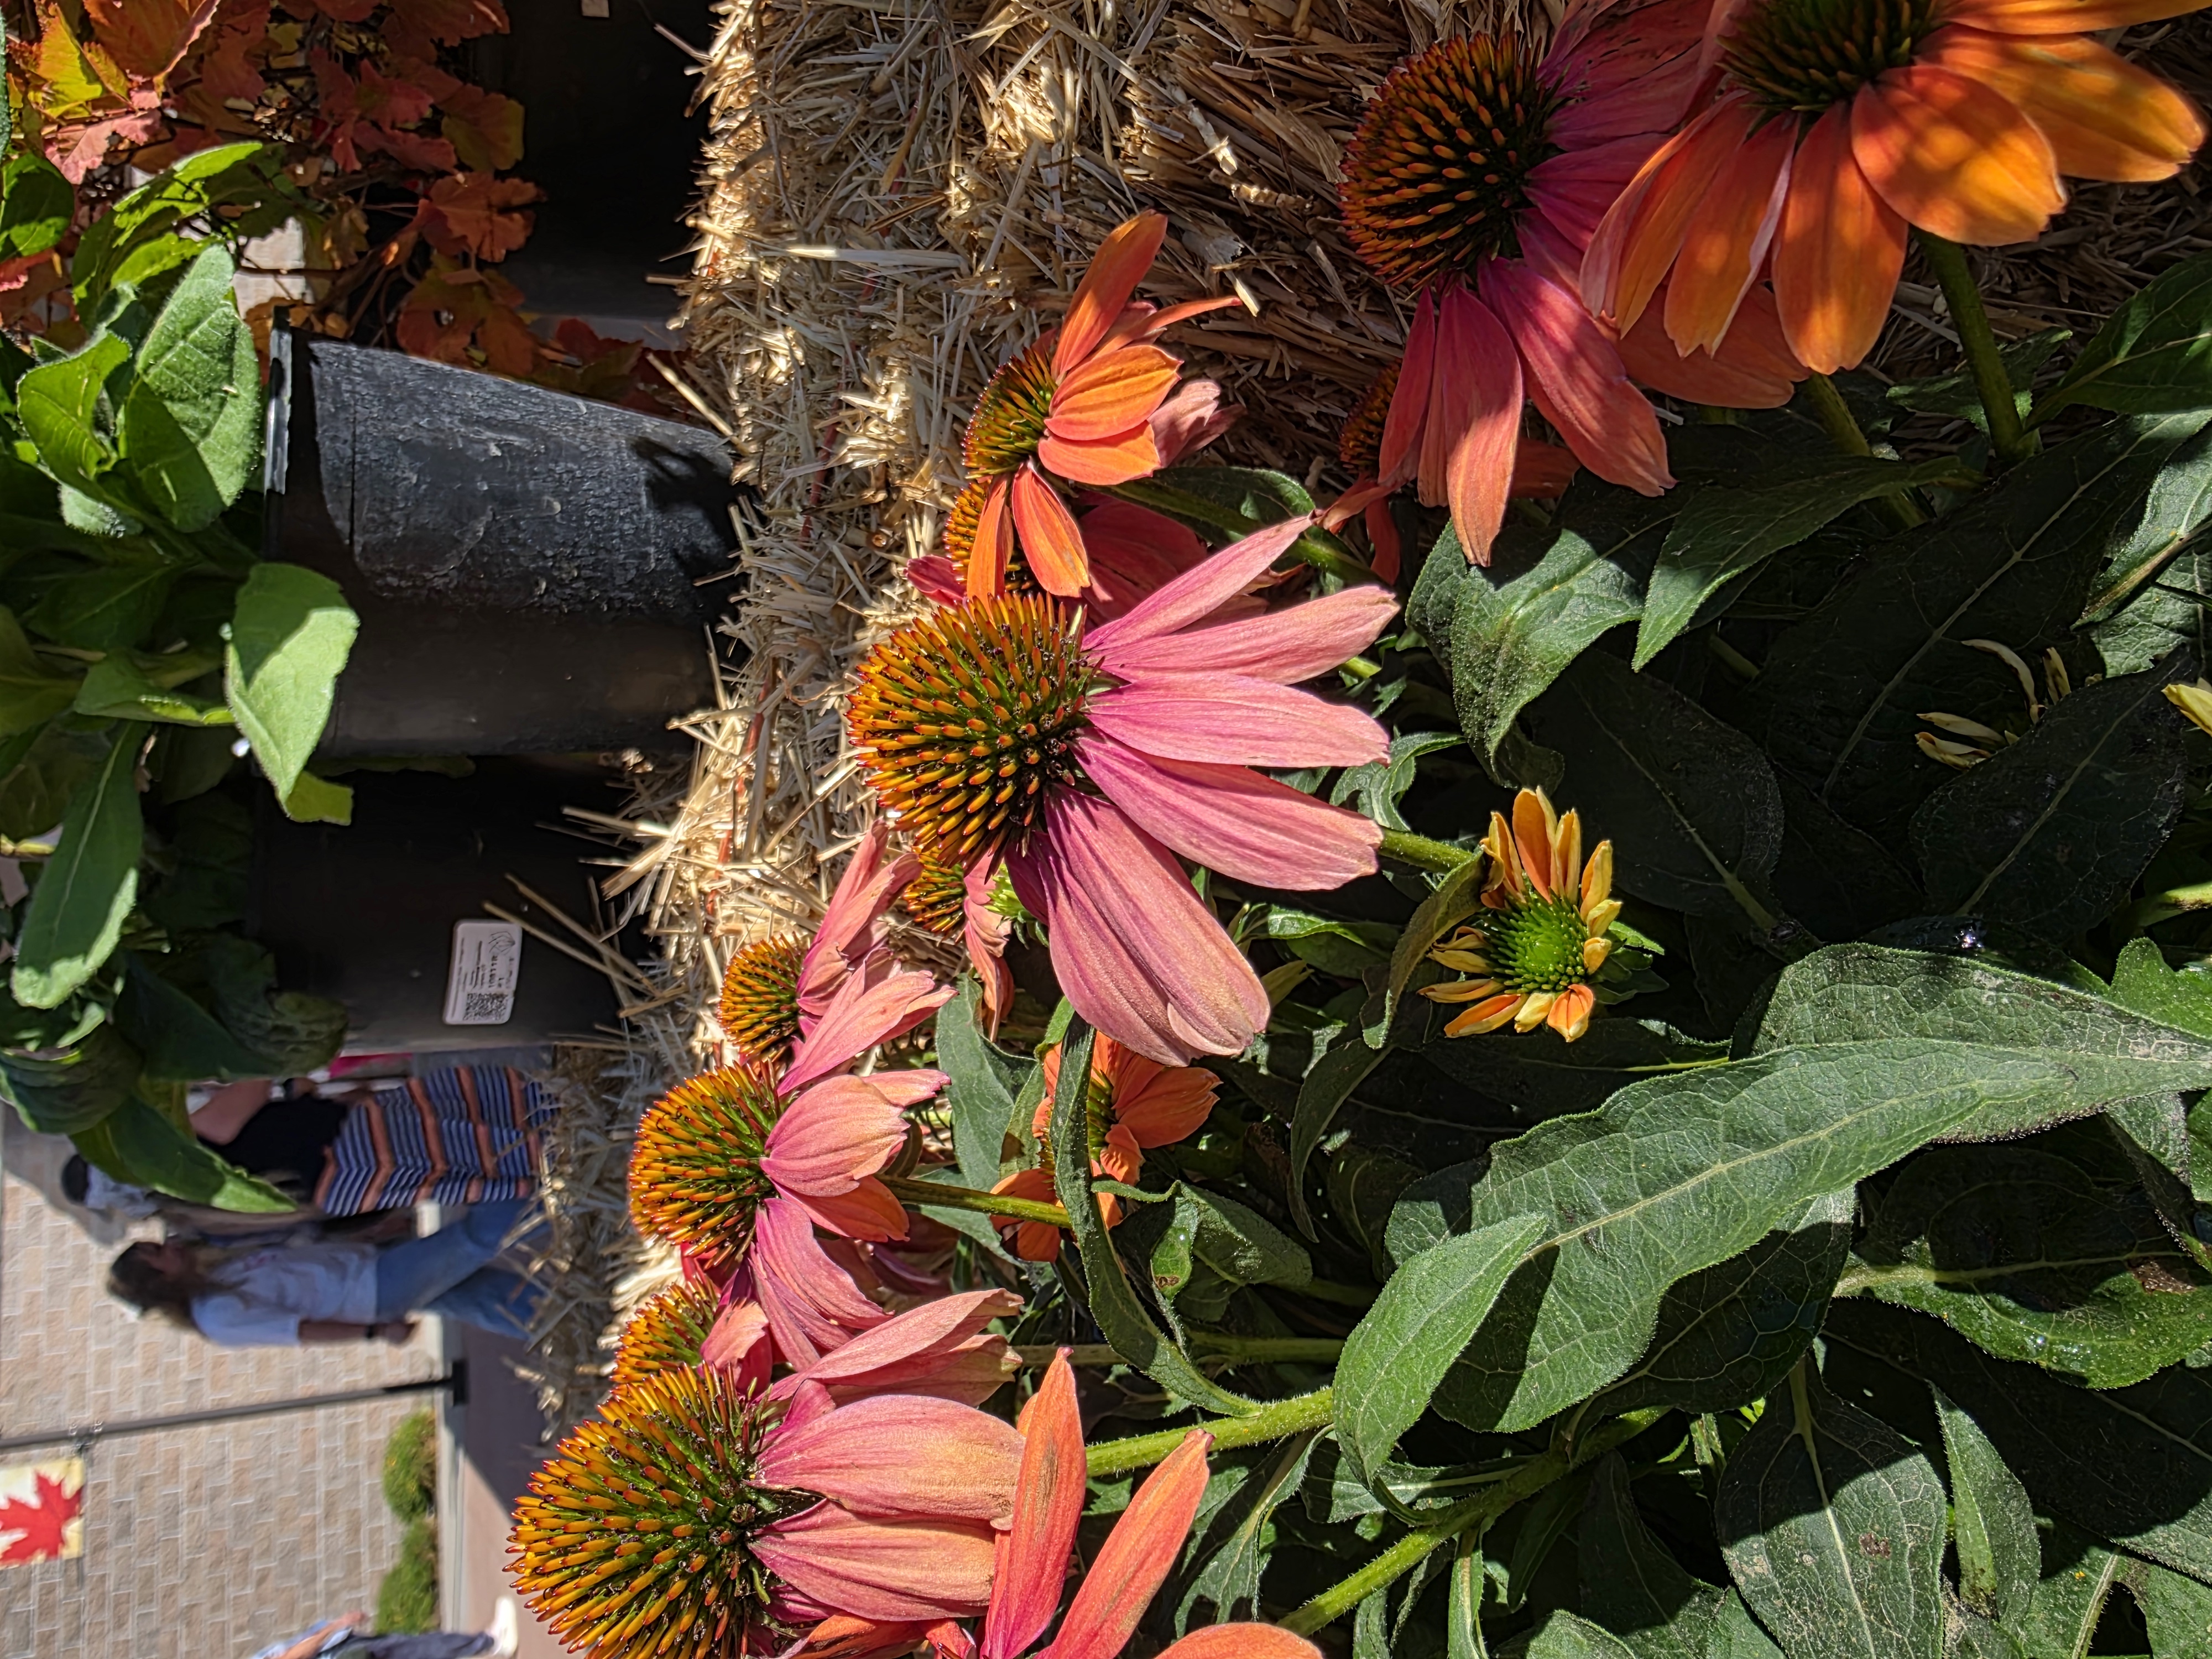
Their dusty pink petals, rusty-orange centers and fading late-summer colors caught my eye, so I pulled out my phone and took a few pictures.
I wasn't thinking about painting them.
I just thought they were pretty, and I wanted to remember them.
A few days later, I was trying to decide what to paint for this week's Creative Heart Journal when I came across those photographs again.
And suddenly I had my idea.
From Photo to Painting: An Easy Coneflower Watercolor Tutorial for Beginners
You Don't Have to Paint Everything You See
Mixing Our September Garden Colors
A Fun Trick for Painting Perfect Little Dots
Paint These Easy Coneflowers With Me
Are coneflowers easy to paint in watercolor?
What watercolor colors do I need for this coneflower painting?
Do I need to know how to draw to paint these coneflowers?
How do you make the tiny watercolor dots?
Can I use a photograph as a reference for a watercolor painting?
What else can I use the paintbrush-handle dot technique for?
You Don't Have to Paint Everything You See
The actual coneflowers in my photograph weren't particularly simple.
There were flowers overlapping one another, leaves going in every direction and lots of little details. If I had tried to reproduce exactly what was in the photograph, this week's project would have become much more complicated than I wanted it to be.
So I didn't.
Instead, I asked myself what I actually liked about the photograph.
It was the shape of the flowers. The beautiful dusty pink and rusty-orange colors. Those wonderful spiky centers. And the feeling of late September, when the garden hasn't quite given up on summer yet.
That was enough.
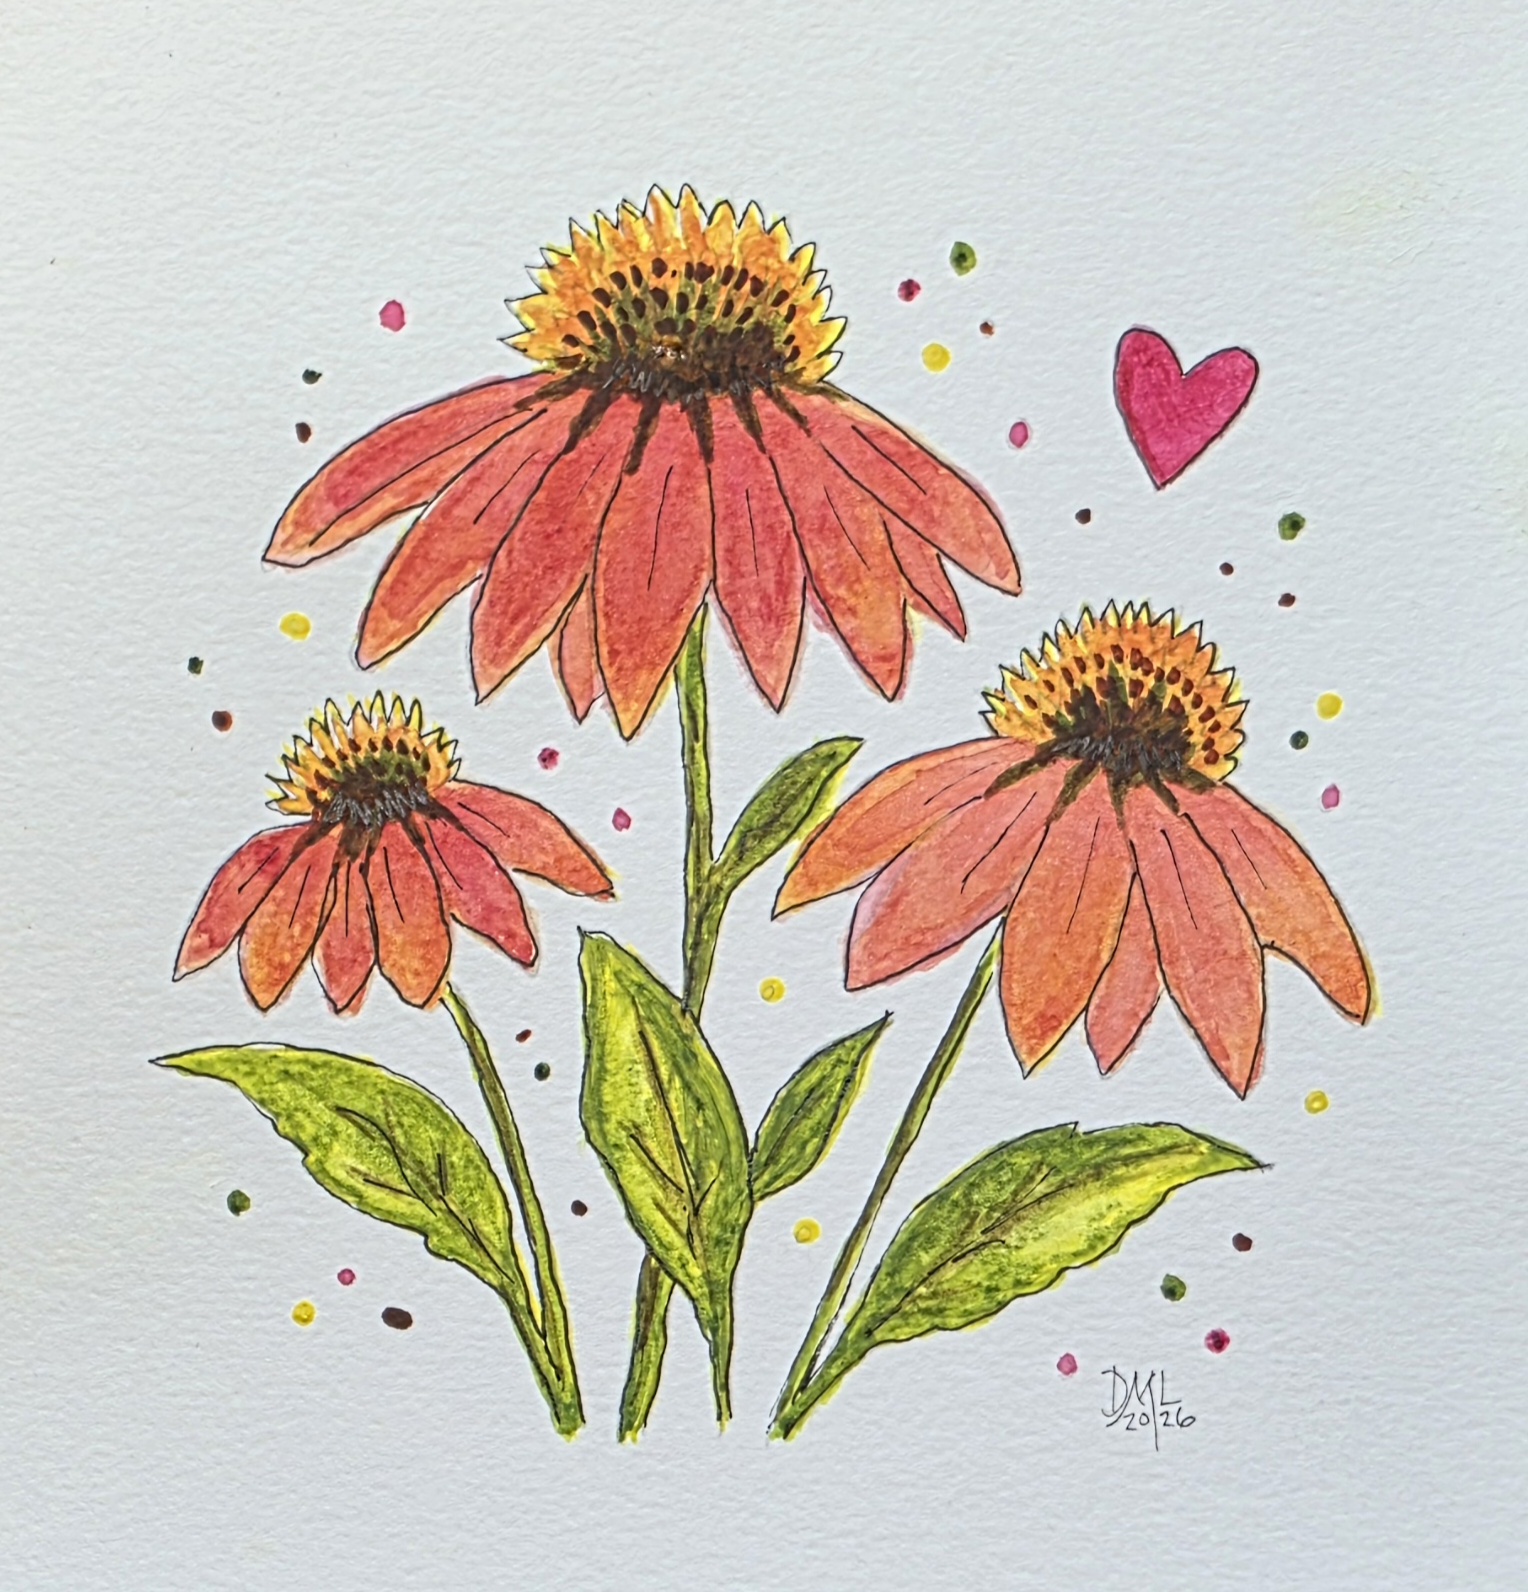
I chose three flowers, separated them so the petals wouldn't overlap, simplified the leaves and left plenty of white space around everything.
The photograph became inspiration rather than instructions.
That's something I'm learning more and more as I paint: you don't have to include everything you see.
You get to decide what stays, what goes and what becomes yours. That's especially freeing when you're a beginner and a photograph feels much too complicated to paint.
Here's the photograph I took at the conference:
And here is the painting I created based on a simplified version of my photo:
Mixing Our September Garden Colors
This project also gave me another chance to play with our September Garden palette: Sunlit Gold, Rust Orchard, Fallen Bark, Evergreen Hush and Dusty Bloom.
The coneflowers were perfect for it.
I started with yellow and warm red-orange tones and then layered in Dusty Bloom to create those rosy petals. The centers gave me a place to bring in the warmer golds and browns, while Evergreen Hush worked naturally for the stems and leaves.
One of my favorite things about working with a limited palette is discovering how many colors you can make without reaching for another tube of paint.
A Fun Trick for Painting Perfect Little Dots
There's also a very simple technique in this week's tutorial that you can use in all kinds of whimsical paintings.
Those tiny round dots scattered around the flowers can actually be surprisingly difficult to make with the point of a paintbrush.
So turn your brush around!
Dip the non-brush end of the handle into your watercolor paint, touch it straight down onto the paper and lift it back up.
You'll get a wonderfully round little dot.
More paint makes a bigger dot. Less paint makes a smaller one.
It's such a simple trick, but it's useful for flower centers, berries, decorative details and all sorts of little finishing touches.
Paint These Easy Coneflowers With Me
For this week's project, we'll paint three simple coneflowers together from beginning to end.
We'll start with an easy outline, build the flowers in layers using our September Garden colors, add the leaves and centers, and finish with a few fine black details and those fun little dots.
And yes, there's a tiny heart in there too. ❤️
WATCH THE EASY CONEFLOWER WATERCOLOR TUTORIAL ON YOUTUBE:
No watercolor experience is necessary. You can trace the outline if you'd rather not draw the flowers yourself, and you certainly don't need to use the exact same paints I do.
The idea isn't to make yours look exactly like mine.
It's to notice something you like and see where it takes you.
Join Me at the Kitchen Table
If you'd like a new beginner-friendly watercolor project each Friday, you can get the Creative Heart Journal delivered free to your inbox.
You'll also receive my Whimsical Bird Trio watercolor tutorial as your welcome bonus.
Get the Free Creative Heart Journal here: https://creativewannabes.com/sign-up
You can also join me for my free monthly online watercolor class:
Join My Free Watercolor Class here: https://kitchentablecreativity.com/free-workshop
And I'd love to have you in our Facebook community for women who are beginning watercolor:
Join Create with Missus Midlife on Facebook: https://www.facebook.com/groups/createwithmissusmidlife
Frequently Asked Questions
Are coneflowers easy to paint in watercolor?
Yes! Coneflowers can look complicated in a photograph, but they become much easier when you simplify them into a center, loose petals, a stem and a few leaves. In this easy coneflower watercolor tutorial, we paint just three flowers and leave out unnecessary details.
What watercolor colors do I need for this coneflower painting?
I used my five-color Fall Collection palette: Hansa Yellow Light, Transparent Red Oxide, Raw Umber, Sap Green and Quinacridone Rose. You don't need these exact paints - similar yellow, rusty orange, brown, green and rosy pink watercolors will work.
Do I need to know how to draw to paint these coneflowers?
No. This project is designed for beginners, and you can use a simple traced outline if drawing the flowers feels intimidating. The goal is to enjoy painting the shapes and colors, not to create a botanically perfect flower.
How do you make the tiny watercolor dots?
Turn your paintbrush around and dip the end of the handle into your watercolor paint. Touch it straight down onto the paper and lift it up. More paint creates a larger dot; less paint creates a smaller one.
Can I use a photograph as a reference for a watercolor painting?
Absolutely. You don't have to copy everything in your photograph. For this painting, I used my coneflower photo as inspiration, then removed overlapping flowers and extra foliage and simplified the composition to make it beginner-friendly.
What else can I use the paintbrush-handle dot technique for?
It's a fun little trick for flower centers, berries, decorative dots and other whimsical details. Experiment with different amounts of paint to create different-sized dots.
This Week's Heart Practice
Today I notice what catches my eye.
I like this week's Heart Practice because it's something you can do without even picking up a paintbrush.
Look around when you're walking outside. Notice a flower in someone's garden. A funny-shaped leaf. The colors in the sky. A bowl of fruit sitting on the kitchen counter.
Take the picture even if you have absolutely no idea what you'll do with it.
That's exactly what happened with these coneflowers.
When I stopped to photograph them last Saturday, I had no idea they would become this week's painting.
A few days later, I looked at that photograph differently. Instead of seeing every petal, leaf and overlapping flower as something I needed to reproduce, I started looking for the simplest version of what had caught my attention in the first place.
Three flowers.
A few leaves.
Some beautiful September colors.
And, naturally, one tiny heart.
Sometimes creativity begins with nothing more complicated than paying attention.
With heart and color,
💛 Donna

